fbpx

Katsu Burgers

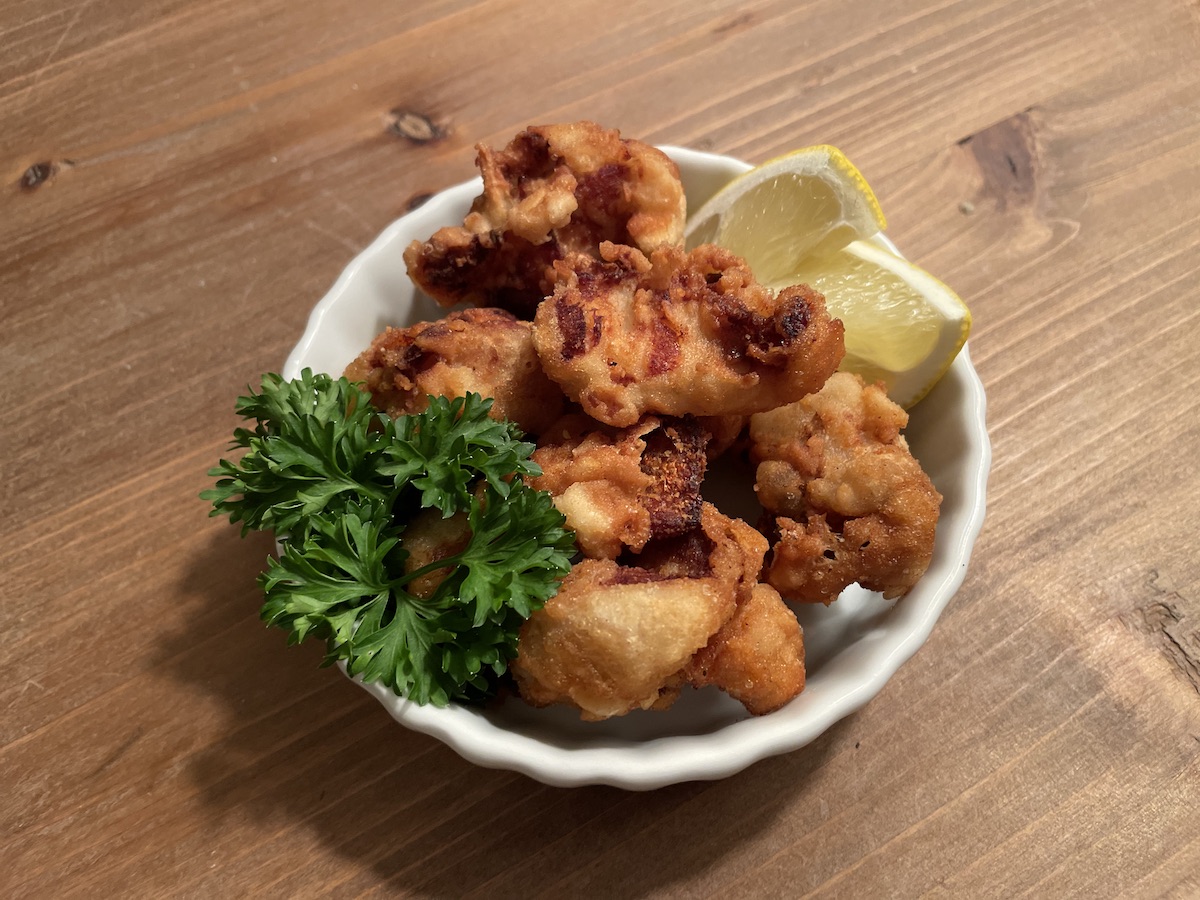
After a bit of a break for the holidays, it’s time to get back with some more dishes! This is a fusion version of the Japanese Menchi Katsu. Imagine a twist on meatloaf and burgers! This is simple yet great tasting

List of Ingredients

  • 1 Lbs. Ground beef
  • 1 Egg, Lightly beaten
  • ¼ Cup Grated yellow or white onion
  • ⅓ Cup Panko (Japanese Style Bread Crumbs)
  • ½ Cup Ketchup
  • ½ Tbs. Worcestershire sauce
  • ½ Tbs. Dried parsley
  • ½ Tsp. Dried thyme
  • ¼ Tsp. Garlic powder
  • ½ Tsp. Diamond Crystal kosher salt (Morton’s is not the same…use less.)
  • ½ Tsp. Ground black pepper
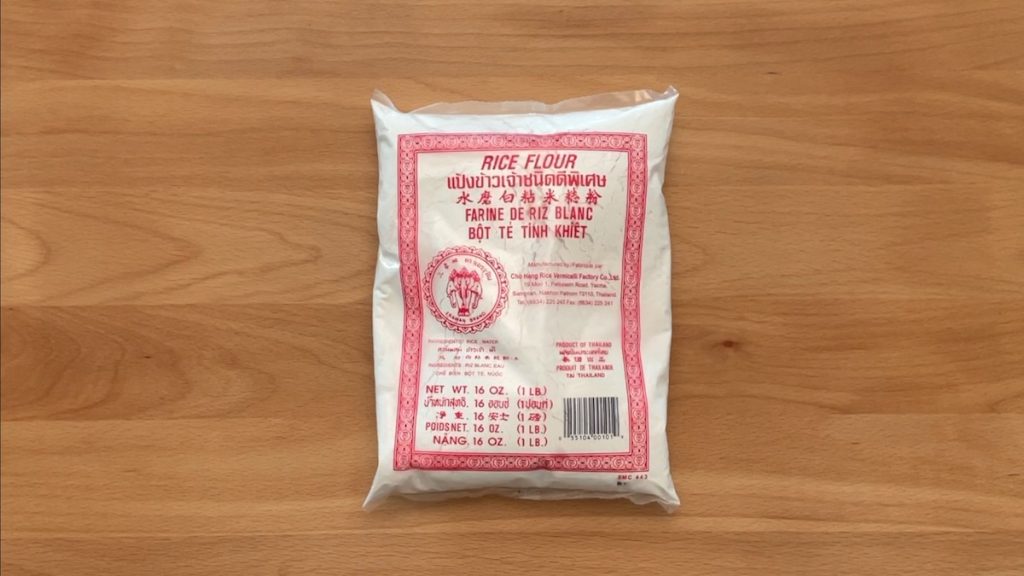
  • 3 Tbs. (heaping) Rice flour for batter plus more if necessary, use non-glutinous rice flour from Asian markets, Bob’s Red Mill will seem gritty
  • Non-dairy substitute or milk (or water in a pinch) to form batter
  • Oil for frying, enough for about 1 inch deep
  • Sauce for serving

    Enjoy as is or with store bought katsu sauce, A-1 or ketchup.

    Or make your own sauce:
    3 Tbsp Ketchup
    ~1-2 Tsp Worcestershire sauce
    Adjust to your taste!

List of Tools

  • Medium sized mixing bowl
  • Fork for beating the egg and to help with the batter/dredging of patties
  • Measuring spoons
  • Grater for the onion
  • Cutting board and knife
  • ¼ Cup measuring cup for the onion
  • ⅓ Cup measuring cup for the panko
  • Measuring cup and spatula for the ketchup
  • Small bowl for mixing batter plus spoon for rice flour
  • Small bowl for panko
  • Two large plates – one when making patties, one for after dipping/coating patties with panko
  • Heavy gauge pot for frying (I use a 3 quart pot to conserve on oil.)
  • Cooking chopsticks or tongs
  • Skimmer and resting plate, use if necessary to remove stray panko from pot to prevent oil from forming a burnt flavor
  • Cooling rack and paper towels and baking sheet
  • Baking sheet for back burner for easier clean-up of the stove
    Serving plate

Directions

Prepare the ground beef

Add ground beef to a medium sized mixing bowl and add lightly beaten egg. Peel and grate ¼ C onion and add to bowl. Add all the remaining ingredients listed. Mix all the ingredients together thoroughly. (I do this by hand.)
Carefully make small slider sized patties with about ¼ cup seasoned meat and place on a large plate. (Makes approximately 15 patties total)

Make batter

Using a bowl, combine rice flour with non-dairy substitute or milk. Form a batter that is similar to a pancake batter. Use more liquid to achieve the correct consistency.

Coat meat patties

Dip one patty in the batter completely and coat with panko on all sides. Set aside on a separate plate. Be sure the patties do not touch and do not stack. Get another plate is necessary. Continue with the remaining patties.

Fry the panko covered patties

Heat the oil in the pot on medium high. The oil is ready when a piece of panko floats quickly to the surface and the oil bubbles quickly. When ready, add the patties to the oil, do not overcrowd. Let fry untouched to set the batter then check that no pieces are stuck to the bottom. Let the pieces cook on one side before turning.

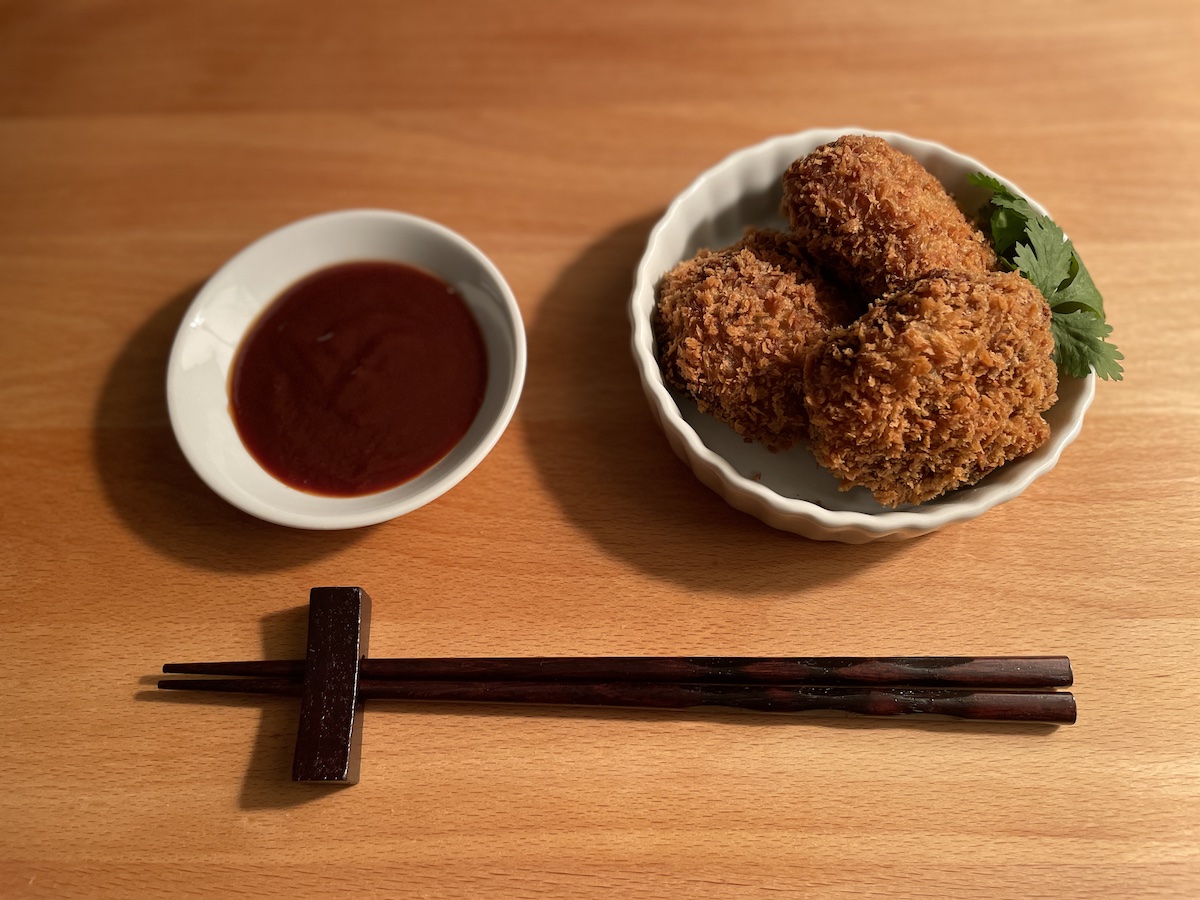
The patty is done when the outside is golden and has browned evenly. Place on a prepared cooling rack . Continue until all the pieces are fried!

Enjoy!


Don’t forget to submit a photo of your creations!  You can upload your photos using my Contact form!

Asian-style Garlic Glass Noodles

A wonderful dish in its simplicity of ingredients and complexity of flavors. A great side dish to your vegetable or protein or eat as your main event! These noodles are easy to prepare and come together quickly. Definitely worth trying if you are not familiar with this ingredient! And what better way than with lots of garlic!

Just remember in this case, simplicity shines the spotlight on the ingredients…and in particular, the fish sauce. Please don’t deviate from the recommended brand/s…I always hate buying that one ingredient just to make that one dish… so I promise to follow-up with more recipes to use your fish sauce. How does hot and sour soup sound?! Anyway, this is a great dish!

List of Ingredients

  • 4 (2 oz.) Bundles of Bean thread vermicelli or mung bean noodles (any brand)
  • 2 Tbsp Finely chopped garlic (can use more!)
  • 2 Tbsp Sugar
  • 1 Tsp Ground black pepper
  • 2 Tbsp Oyster sauce (any brand)
  • 2 Tsp Chicken bouillon (Better Than Bouillon Roasted Chicken Base highly recommended)
  • 1 Tsp Sesame oil (Kadoya Pure Sesame Oil highly highly recommended)
  • 1 Tbsp Fish Sauce (Viet Hu’o’ng Three Crabs Brand Fish Sauce ONLY)
  • 2 Tbsp Fresh squeezed lime juice
  • 2-3 Tbsp Neutral flavored oil for frying (I use refined coconut oil.)

List of Tools

  • Medium/large mixing bowl to soak noodles
  • Colander to drain noodles
  • Small bowl or measuring cup for making seasoning
  • Spoon for mixing and spatula
  • Measuring spoons and a measuring glass is helpful
  • Juicer
  • Cutting board and knife
  • ⅛ Cup to measure garlic
  • 2 spatulas and resting plate
  • Large wok-like pot
  • Serving plate

Directions

Prepare the garlic

Peel and finely chop ~2 Tbsp of garlic (or a little more!) and set aside.

Try to prepare garlic first to allow it to sit for a minimum 10-15 minutes tooptimize the health benefits. The act of breaking the clove triggers a reaction that boosts the healthy compounds and limits the damage from heat.

Soak the bean thread

Soak 4 (2 oz.) bundles of bean thread noodles in tepid water. Be sure all the noodles are submerged.

Mix together seasoning

In a small bowl, mix together the sugar, oyster sauce, black pepper, chicken stock, fish sauce, lime juice, and sesame oil. Set aside.

Drain the noodles

Drain the noodles and place by the stove.

Time to cook

Heat the oil in a large wok-like pot on medium. Once the oil is heated, fry the garlic until cooked but not brown. (Approx. 3-4 minutes)

Add the drained noodles just before the garlic begins to brown and toss with the garlic using spatulas. (You may need to turn down the stove at this point.)

Add the sauce by pouring over a wide area not just in one spot.

Continue to toss and mix in the seasoning thoroughly. The noodles will cook quickly so the dish is ready when all the ingredients are mixed well and tossed completely!

Enjoy!


Don’t forget to submit a photo of your creations!  You can upload your photos using my Contact form!

3-D Gift Bag Card

This is just a fun way to dress up otherwise boring cash gifts for the holidays!

Enjoy!

List of Materials

  • 12 inch x 12 inch cardstock
  • Silver foil cardstock (any size)
  • Colored paper (5 ¼ in x 6 in) or origami paper (15cm x 15cm trimmed on one side)
  • White copier paper
  • Paper trimmer (optional but helpful)
    • Rotary trimmer
    • Sliding trimmer with scoring option
  • Pencil and ruler and eraser
  • Scissors
  • Decorative crafting scissors
    I am using Fiskars “Paper Edges.”
  • Small hole punch
    I am using a metal hole punch 1.5 mm.
  • Ribbon, ⅛ inch or 3mm wide
  • Regular tape (any width)
  • Double stick tape ½ inch wide or less

As an Amazon Associate I earn from qualifying purchases.

Moist and Crispy Chicken Karaage

I was so excited when a request was made for a dish! Then I realized it was for chicken karaage and then I immediately thought how is this ever going to work. My biggest complaints about the dish were always…

  1. dry
  2. soggy (Yes, a dish that is both dry and soggy…)
  3. greasy
  4. all of the above

By breaking away from standard methods of preparing the dish, I am happy to say that you can make a moist and crispy chicken karaage without being greasy! It does take a bit of planning, but I think it is well worth it for some amazing results!

List of Ingredients

  • 1-1 ½ lbs. Boneless chicken thigh, skin-on
  • 5 Tbs. Soy sauce or tamari sauce and enough water to fill up to 1 C liquid
  • ½ Lemon, sliced
  • ½ Cup ginger, peeled and thinly sliced
  • 1 Clove garlic, smashed
  • 3 Tbs. (heaping) Rice flour (not glutinous rice flour) for batter plus more if necessary, avoid using Bob’s Red Mill as it will seem gritty. The rice flour can be purchased from any Asian market.
    Rice Flour
    Rice Flour
  • Milk or non-dairy substitute to form batter (I like using oat milk.)
  • Cornstarch (or potato starch) for coating chicken
  • Oil for frying, enough for about 1 inch deep (I use refined not virgin coconut oil. It’s my favorite oil for deep frying.)

List of Tools

  • Measuring cup
  • Measuring spoons and/or measuring glass
  • ½ Cup measuring cup
  • Small mixing bowl or I use a 4 cup measuring cup for making the brine
  • Chopsticks and spoon
  • Cutting board and knife
  • Paring knife or spoon for peeling ginger
  • Glass container with lid or gallon sized Ziploc
  • Small bowl for batter
  • Small bowl for cornstarch
  • Two large plates – one lined with paper towels for the draining chicken, one for the battered chicken
  • Heavy gauge pot (I use a 3 quart pot to use less oil.)
  • Cooking chopsticks or tongs
  • Cooling rack and paper towels and baking sheet for the fried chicken
  • Serving plate

Directions

Prepare the chicken thigh

Cut boneless chicken thigh with skin-on into 1” by 1” pieces. Cut the pieces into similar sizes to cook evenly and relatively small to cook thoroughly. Typically, it is easier to find bone-in chicken thigh which will need to be deboned. When finished cutting the chicken into pieces, place in a lidded container or a gallon sized Ziploc. Set aside.

Prepare the brine for the chicken

Add 5 Tbs of soy sauce or tamari sauce to a 4 cup measuring cup. Now, add enough cold water to the measuring cup for 1 cup of liquid. Slice ½ a lemon thinly. Squeeze the slices over the measuring cup and then add into the brine. Add 1/2 cup peeled and thinly sliced ginger. Add 1 peeled and smashed garlic clove and 1/4 Tsp maple syrup or similar sweetener. Give the brine a good stir and check the flavors for a good balance. Set aside.

Add chicken to brine

Pour brine into the container with the chicken. Mix thoroughly and cover. Let sit in the refrigerator 4-5 hours or even longer.

For the last 30-60 minutes, pull out the container from the refrigerator and let it come up to room temperature. (This will make for crispier chicken when fried.)

Using a large plate lined with paper towels, pull the chicken out of the brine and let drain on the plate.  Lightly pat the chicken on top to soak up additional brine.

Coat the chicken

Traditional karaage does not use a batter (and doesn’t brine either) but it is worth the extra step. Make a rice flour batter with a non-dairy substitute or milk. (Consistency should be similar to pancake batter.) Dip the now dry pieces of chicken inside the batter and dredge with cornstarch. Set aside the pieces on a different large plate. (Grab another plate if you run out of room for all the battered chicken. Do not stack or overcrowd.)

Fry the battered chicken

Heat the oil in the pot (enough for about 1 inch deep) on medium high. The oil is ready when it bubbles quickly when a small piece of chicken is added.  (The piece of chicken should also float quickly to the surface.) Once heated, begin adding the chicken to the oil, do not overcrowd. Let fry untouched to set the batter then check that no pieces are stuck to the bottom. Be good about agitating the pieces so that they cook evenly. The chicken is cooked when the outside is golden and has browned evenly. Place the cooked pieces on a baking sheet lined with paper towels and a cooling rack on top. Continue until all of the chicken is cooked. Serve with some freshly squeezed lemon juice!

Enjoy!


Don’t forget to submit a photo of your creations!  You can upload your photos using my Contact form!

Creamy Japanese Sesame Seed Salad Dressing

Make this creamy Japanese Sesame Seed dressing for an impressive salad to start any number of meals from what we make on this blog.  By replacing the mayonnaise with Vegenaise®, it can also be made vegan! It’s simple to make but packs lots of flavor! 

Ingredients

  • *⅓ Cup Roasted white sesame seeds, ground
  • ¼ Cup Rice vinegar (Mizkan preferred)
  • ¼ Cup Sugar
  • ¼ Cup Neutral oil, like avocado oil
  • 1 ½ Tsp Soy sauce or tamari sauce
  • ~1-2 Tbs Grated yellow or white onion (to taste)
  • ⅛ Cup Mayonnaise (optional) or I like to use Vegenaise®.
  • Salt and pepper, sprinkle to taste

*Grinding sesame seeds can be done in a number of ways. There are handheld sesame grinders, a suribachi (Japanese grinding bowl) and surikogi (Japanese wood pestle) or placing the sesame in a Ziploc bag and rolling with a rolling pin. (Be sure to press out the air from the Ziploc and seal securely before rolling!)

White Sesame Seeds and Grinder
White Sesame Seeds and Handheld Grinder

Ziploc and Rolling Pin
Ziploc and Rolling Pin for grinding sesame seeds

List of Tools

  • Small mixing bowl
  • Spoon for mixing
  • Measuring cup or measuring glass
  • ⅓ Cup Measuring cup
  • ½ Tbs Measuring spoon which is also 1 ½ Tsp.
  • ⅛ Cup Measuring cup
  • Spatula
  • Cutting board and knife
  • Fine grater
  • Sesame grinder (or a Ziploc bag and rolling pin will also work)
  • Container for storing
  • Serving bowl for the salad

Directions

Crush or grind the sesame seeds

Using any above methods, crush or grind ⅓ cup roasted sesame seeds and place in a small mixing bowl.

Add remaining ingredients to bowl

Now add the vinegar, sugar, oil, soy sauce/tamari sauce to the bowl and stir thoroughly.

Grate yellow or white onion

Peel and finely grate 1-2 Tbs yellow or white onion. It is always best to start conservatively and add more to taste. The onion can quickly overpower the flavor if not careful.

Add the grated onion and sprinkle in some salt and pepper. Taste and adjust the amount of onion.

For a creamier dressing, add ⅛ cup mayonnaise. (optional)

Storage

Store in a glass container to avoid the grated onion from ruining any plastic containers. Then place the dressing in the refrigerator for later use. Be sure to mix again prior to using!

Enjoy!


Don’t forget to submit a photo of your creations!  You can upload your photos using my Contact form!