fbpx

Blog

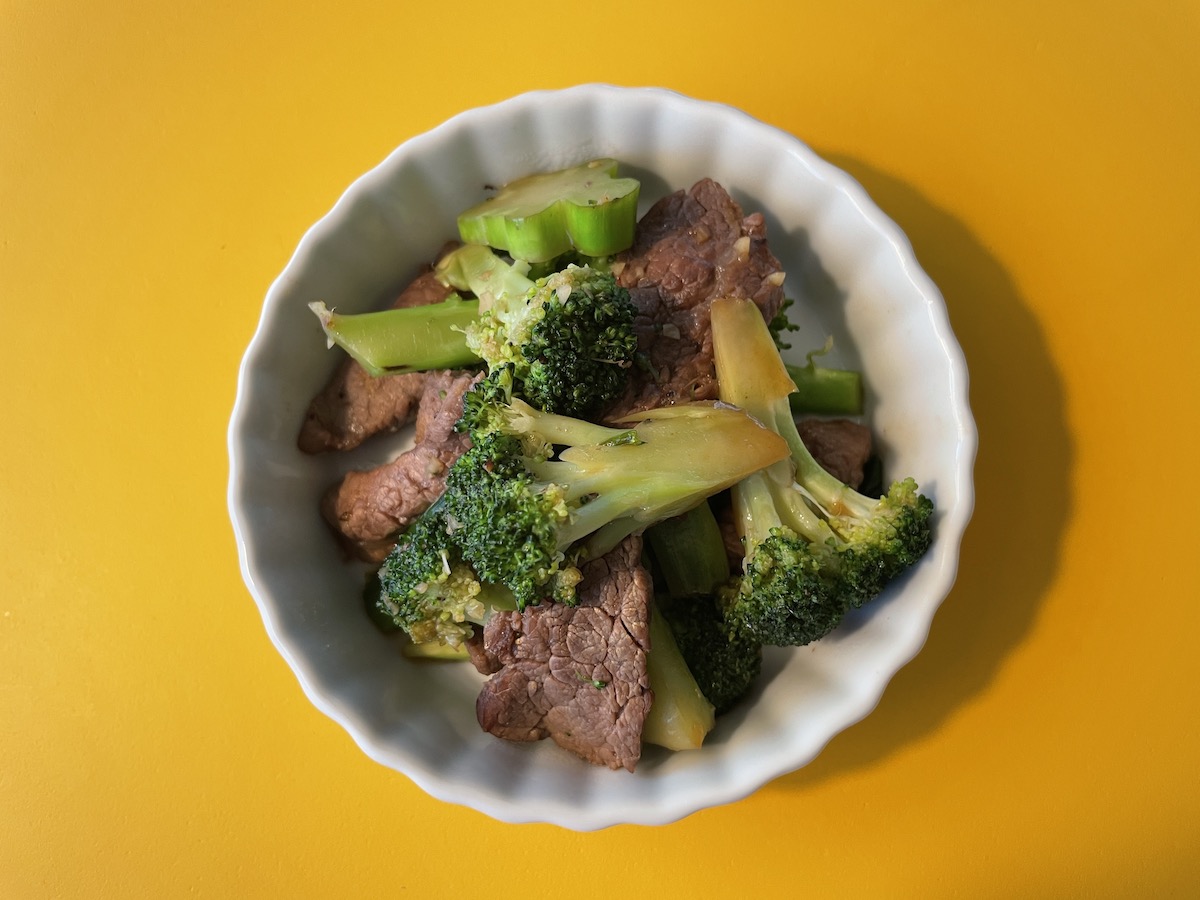
Oyster Sauce Broccoli Beef

Oyster sauce broccoli beef with a Japanese flare! A little bit sweeter, and I believe has better texture by skipping the cornstarch. Enjoy this dish with a pot of rice, and you have a complete meal!

List of Ingredients

4-5 servings

  • ¾-1 lbs. Flank steak, thinly sliced (~¼ inch thick)
  • ¾-1 lbs. Broccoli, use both the crown and stem
  • ~3-4 Stems green onion, cut into 1 inch lengths
  • 2 Cloves garlic, peeled and minced
  • 1 Tsp Fresh ginger, peeled and grated
  • 3 Tbsp Oyster sauce
  • 1 Tbsp Sake, least expensive works
  • 1 Tbsp Soy sauce or tamari sauce
  • 1 Tbsp + 1 Tsp Sugar
  • 1/2 Tsp Chicken bouillon (Optional, however if using, Better Than Bouillon
  • Roasted Chicken Base recommended)
  • Salt and ground black pepper to sprinkle onto the flank steak while cooking (Diamond Crystal Kosher salt recommended)
  • 2 Tbsp Water for steaming broccoli
  • Neutral Oil for frying

List of Tools

  • Mixing bowls
  • Cutting board and knife
  • Paring knife or spoon
  • Fine grater or microplane grater
  • Measuring cup, spoon for stirring, and a spatula
  • Measuring spoons and a measuring glass is helpful
  • Two spatulas and a resting plate
  • Cooking chopsticks
  • Wok-like pan with a lid
  • Serving dish

Directions

Prepare the meat

Remove any extra fat and slice the flank steak across the grain into pieces about ~3” wide x ~¼” thick. (Typically involves cutting the flank steak in half down the grain, then slicing across the grain. It depends on the width of the flank steak.) Set aside in a bowl.

Prepare the broccoli

Rinse and cut the broccoli where the stem meets the base of the crown. Remove the tough skin off the stem by slicing down the sides. Cut the stem into disks just under ¼” inch thick. Slice the large florets into smaller florets by cutting the floret stems in half lengthwise, slicing more if necessary. Try to keep the pieces similar in size to cook evenly. Set aside the cut broccoli pieces in a separate bowl.

Prepare green onions, garlic and ginger

Clean and cut the green onions into 1 inch lengths. Peel and mince the garlic. Peel and grate the ginger. Set everything aside in a small bowl.

Prepare the sauce

Mix the oyster sauce, sake, soy sauce, sugar and chicken bouillon (if using) into a small measuring cup. Set aside.

Time to Cook

In a large wok-like pan, add 1 Tbsp of oil and heat on medium to medium-high. Add the meat and lightly season w/ salt and ground black pepper. Fry until almost fully cooked, leaving some pink. Remove the meat from the pan into a bowl and set aside.

Throw out any remaining juice in the pan and wipe the pan clean with a paper towel. Add another tablespoon of oil and turn the stove to medium high and add the broccoli.

Fry for 1-2 minutes turning over once until bright green. Add ~2 Tbs water and cover immediately. Steam for ~2-4 minutes. (Careful not to overcook.) Remove the broccoli and place into a bowl and set aside.

Add another tablespoon of oil and fry the green onions, garlic and ginger together on medium heat. Now add back the meat and finish cooking the meat if necessary. Then quickly add the broccoli and pour the sauce over everything, tossing thoroughly using spatulas. Cook to desired doneness or about 1 minute, again careful not to overcook.

Enjoy!

Don’t forget to submit a photo of your creations!  You can upload your photos using my Contact form!
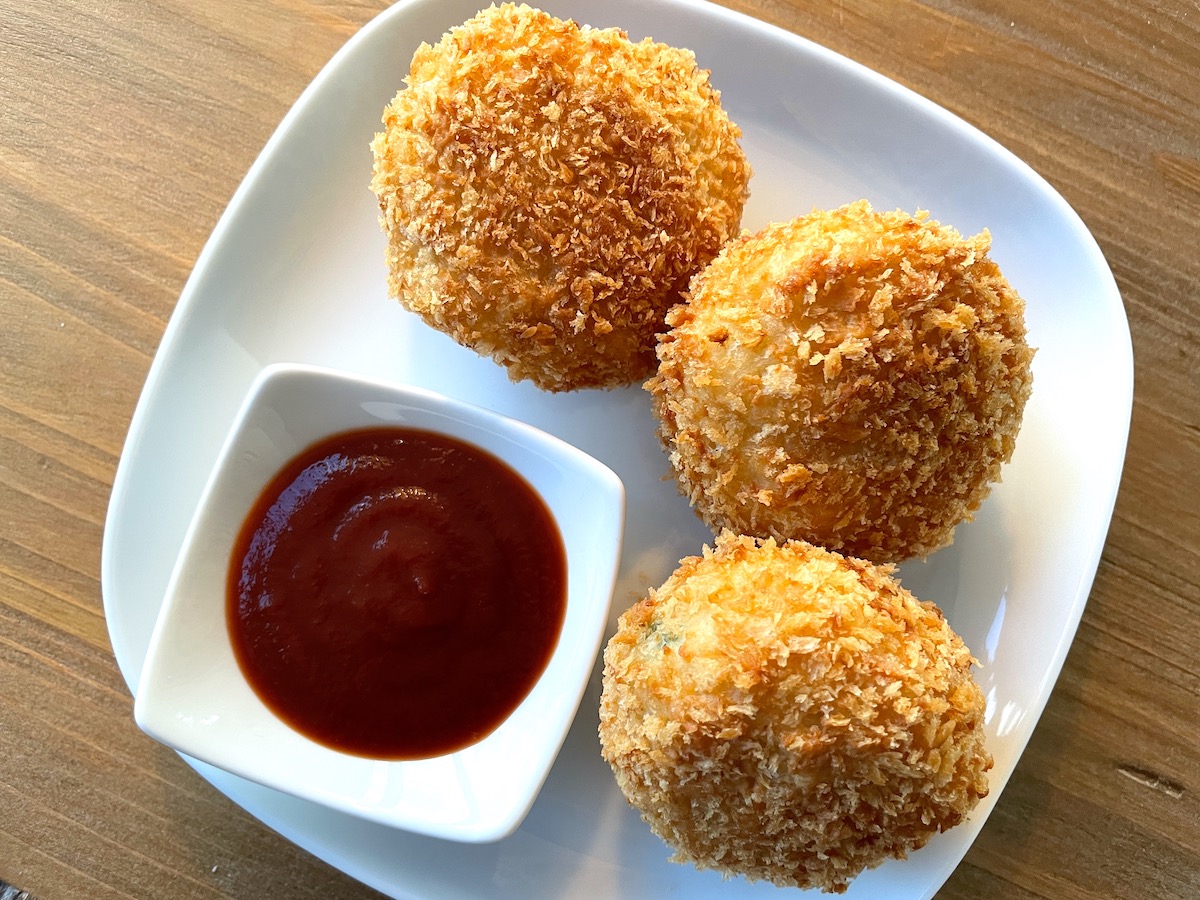
Vegetarian Japanese-Style Potato Croquettes (Korokke)

A comfort dish just in time for the Fall! A crispy and crunchy vegetarian potato croquette that combines simple ingredients for an extremely tasty and satisfying meal!

Over the years, I have modified not only the ingredients but how I handle coating the patties with panko.  The beauty of cooking is adapting dishes! Feel free to do the same! Enjoy!

List of Ingredients

  • 6 C (using a liquid measuring cup) or ~3 lbs Russet potatoes, cubed
  • 1 Egg, room temperature and lightly beaten
  • 1 Small yellow, white or sweet onion, finely diced
  • 1 Medium/Large clove of garlic, minced
  • ~½ C Frozen corn, thawed and drained
  • ~½ C Frozen green peas, thawed and drained
  • ½ Tsp Diamond Crystal kosher salt (Morton’s is not the same…use less.)
  • ½ Tsp Ground black pepper
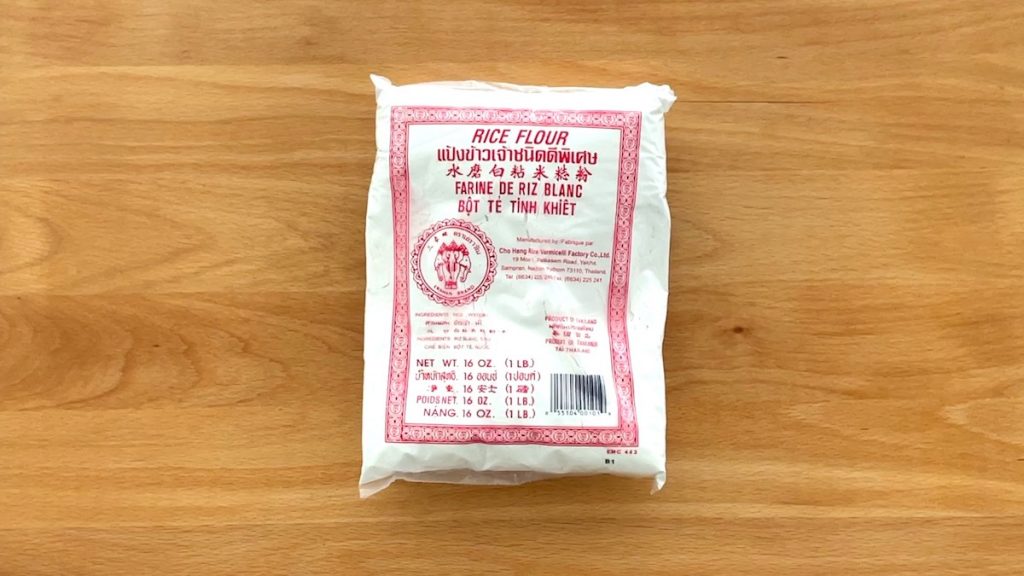
  • 3 Tbsp (heaping) Rice flour for batter plus more as needed, use non-glutinous rice flour from Asian markets (Bob’s Red Mill will seem gritty.)
  • Non-dairy milk substitute or regular milk (or water in a pinch) to form batter
  • Panko (Japanese-style bread crumbs) for coating
  • 1 Tbsp Oil/butter for frying onions
  • Neutral flavored oil for deep frying, enough for about 1 inch deep

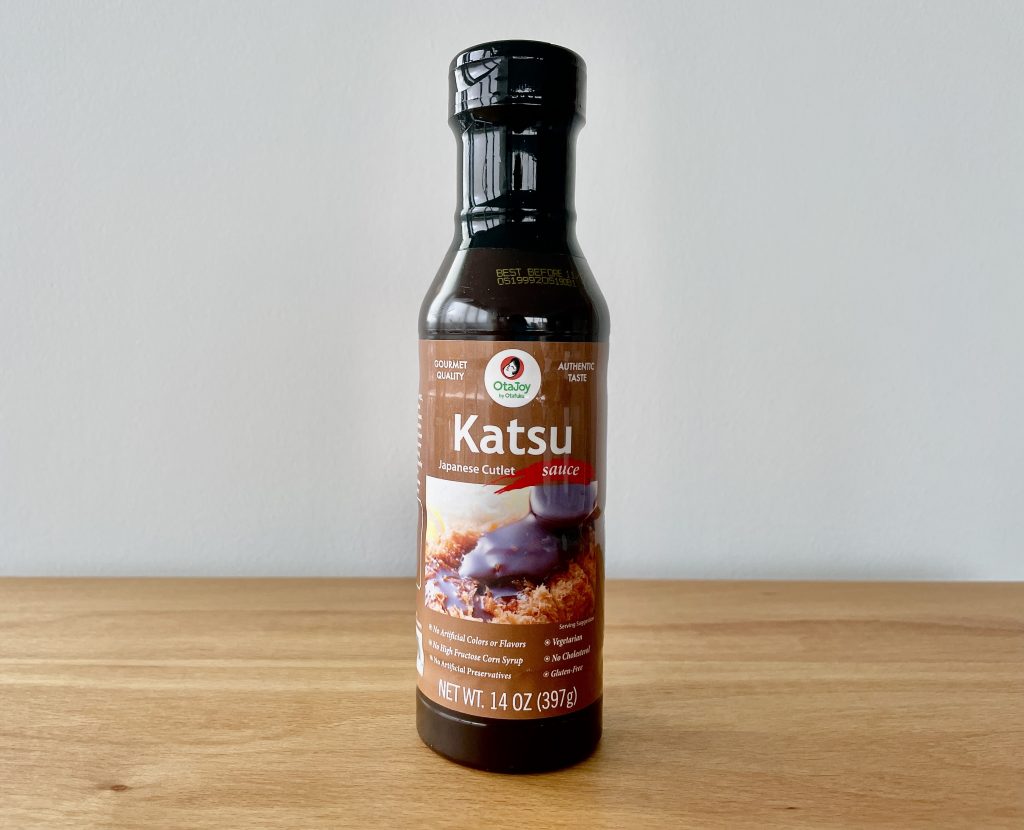
Enjoy as is or with store bought katsu sauce or A-1 or make your own sauce:

  • 3 Tbsp Ketchup
  • ~1-2 Tsp Worcestershire sauce
  • Adjust to your taste!
Katsu Sauce
Katsu Sauce


Non-glutinous Rice Flour
Non-glutinous Rice Flour can be purchased in the Asian market.


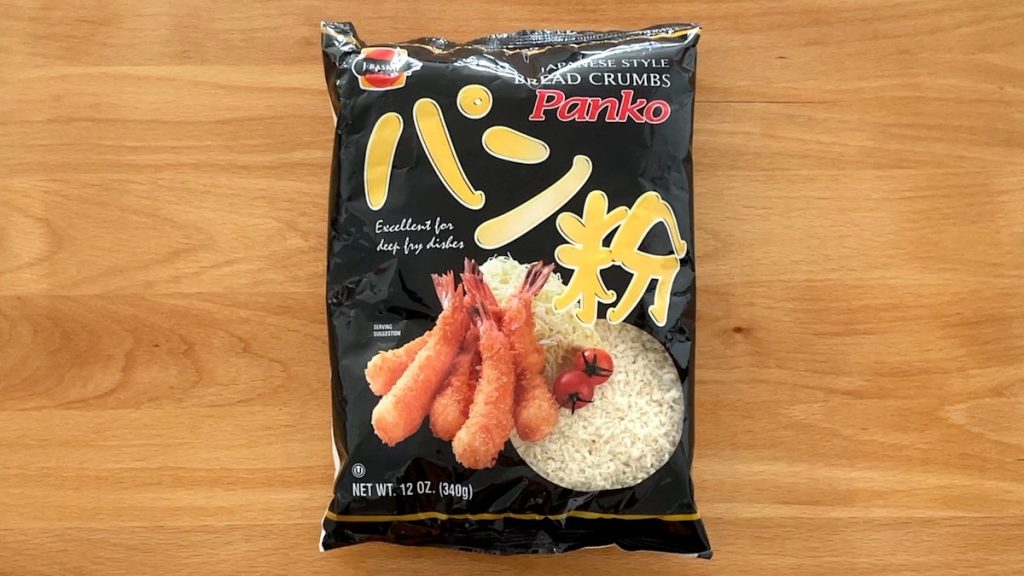
Panko
This is one type of panko (Japanese-style bread crumbs) that can be purchased in Asian markets. Some local grocers carry panko as well.


List of Tools

  • Small bowl and colander for thawing the peas and corn
    Tip: use this small bowl to also lightly beat the egg or I grabbed a separate measuring cup
  • Measuring cups (½ C) for the frozen vegetables
  • Measuring spoons (½ tsp) for the salt and pepper
  • Vegetable peeler
  • Cutting board and knife
  • Large (liquid) measuring cup for the potatoes (I use an 8 C liquid version.)
  • Spatula or cooking chopsticks and a resting plate for frying the diced onion
  • Medium fry pan
  • Large cooking spoon and a resting plate (I used this for frying the onion and to mix all the ingredients together.)
  • Skewer or toothpick for testing the doneness of the boiling potatoes
  • 5 quart pot
  • Large mixing bowl and colander to drain potatoes and mix ingredients. (I used the 5 qt pot and a splatter screen to do this.)
  • Potato masher or fork
  • Fork to help dip patties into the batter and soup spoon for measuring the rice flour
  • One bowl for the panko and one for the batter
  • Large plates or baking sheets for forming potato patties and for battering the patties
  • Baking sheet lined with a paper towel and a cooling rack that fits on top to cool the croquettes. Essential for cooling the croquettes properly to keep crispy and crunchy.
  • 3 qt heavy gauge pot for deep frying (I like using a 3 quart pot to conserve oil.)
  • Skimmer with resting plate for removing any stray panko from the bottom of the pot
  • Freezer safe container for saving some for another time!
  • Wax paper or parchment paper if layering inside the container
  • Serving plate
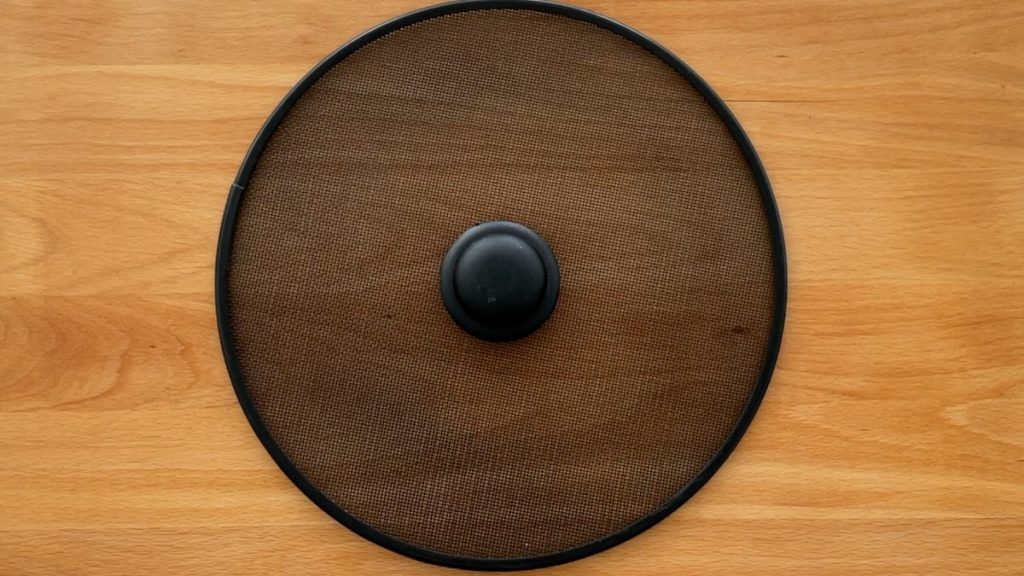
Splatter Screen
A splatter screen is very useful when draining water and grease from pots and pans.


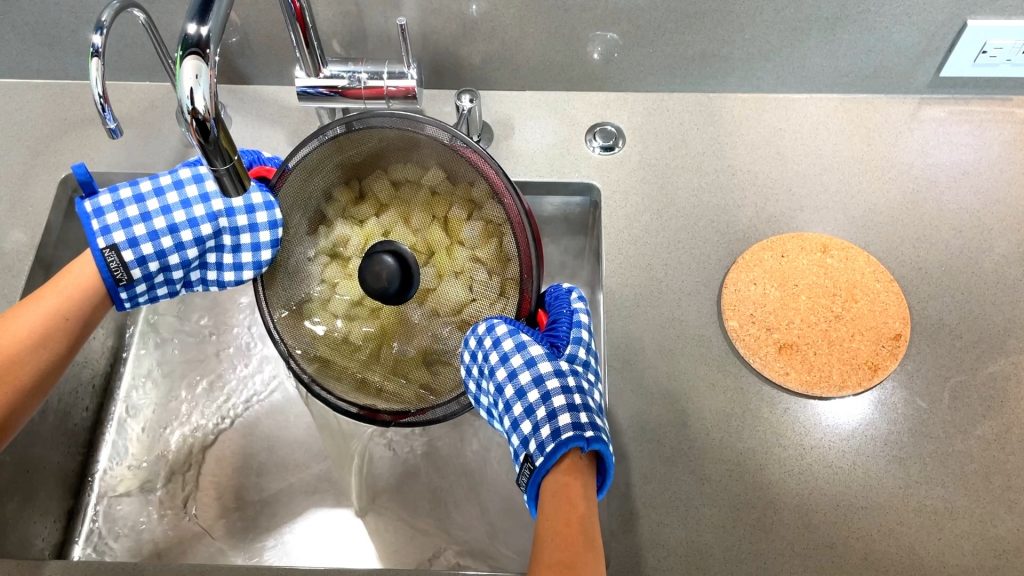
Splatter Screen In Use
Hold it tightly over the top of the pot or pan and drain any unwanted liquid.


Directions

Prepare ingredients

Place corn and peas in a colander, rinse under tepid water to thaw and set aside to drain. Bring 1 egg to room temperature. Peel and mince garlic, set aside. (Breaking the clove triggers a reaction increasing the healthy compounds and limiting damage from heat. But it needs to sit for about 10 minutes.) Peel and dice onion then fry using ~1 tbsp oil or butter on medium. Fry onions until soft but before turning brown. Rinse and peel potatoes, cube into ~½ in. x ½ in. pieces. The actual size is not as important as the consistency in size. The goal is to have the potatoes cook at the same rate. Boil the cubed potatoes in salted water until soft. A toothpick or skewer should easily pierce a piece when done. When finished cooking, drain completely and pour the potatoes into a large mixing bowl or use the same pot to mash the potatoes. Do this with a potato masher or a fork until smooth in texture.

Prepare the patties

Add drained vegetables, cooked onions, garlic, salt and pepper to the mashed potatoes. Now, lightly beat the egg and pour on top and mix thoroughly. Form slider sized patties ~2 ½ in. diameter and ~3/4 in. thick and set aside on a large plate or baking sheet. Do not overcrowd or stack.

Cover with Panko

Combine rice flour with ~ ¼ C non-dairy milk substitute or regular milk in a small bowl. Form a batter similar in consistency to a pancake batter. Use more liquid if necessary and continue to adjust. Place some panko in a separate bowl. Dip one patty in the batter, completely coating and then cover with panko all over. Set aside on a large plate. (Again, do not overcrowd and please do not stack.) Continue until finished making more batter when necessary.

Freeze any extras

If 24 pcs is too much at this point, freeze any before frying. First, cool completely and then add to a freezer safe container. Use wax or parchment paper to separate any layers. (Yep, it is okay to stack when freezing.) When ready to enjoy, deep fry straight out of the freezer. Be careful as any frost or ice crystals will cause the oil to splatter more than usual.

Fry the panko-covered patties

Heat oil in a pot on medium high. The oil is ready when a piece of panko floats quickly to the surface and the oil bubbles quickly. When the oil is heated, add the patties. Please do not overcrowd. Let fry untouched to set the batter then check that patties are not stuck to the bottom. Let the pieces cook on one side before turning. The patty is done when the outside is golden in color and has browned evenly. Remove any stray panko from the pot with a skimmer to prevent oil from forming a burnt flavor. Place cooked patties on a prepared baking sheet lined with a paper towel and cooling rack that fits inside. Continue until all the patties are fried.

Enjoy!

Don’t forget to submit a photo of your creations!  You can upload your photos using my Contact form!

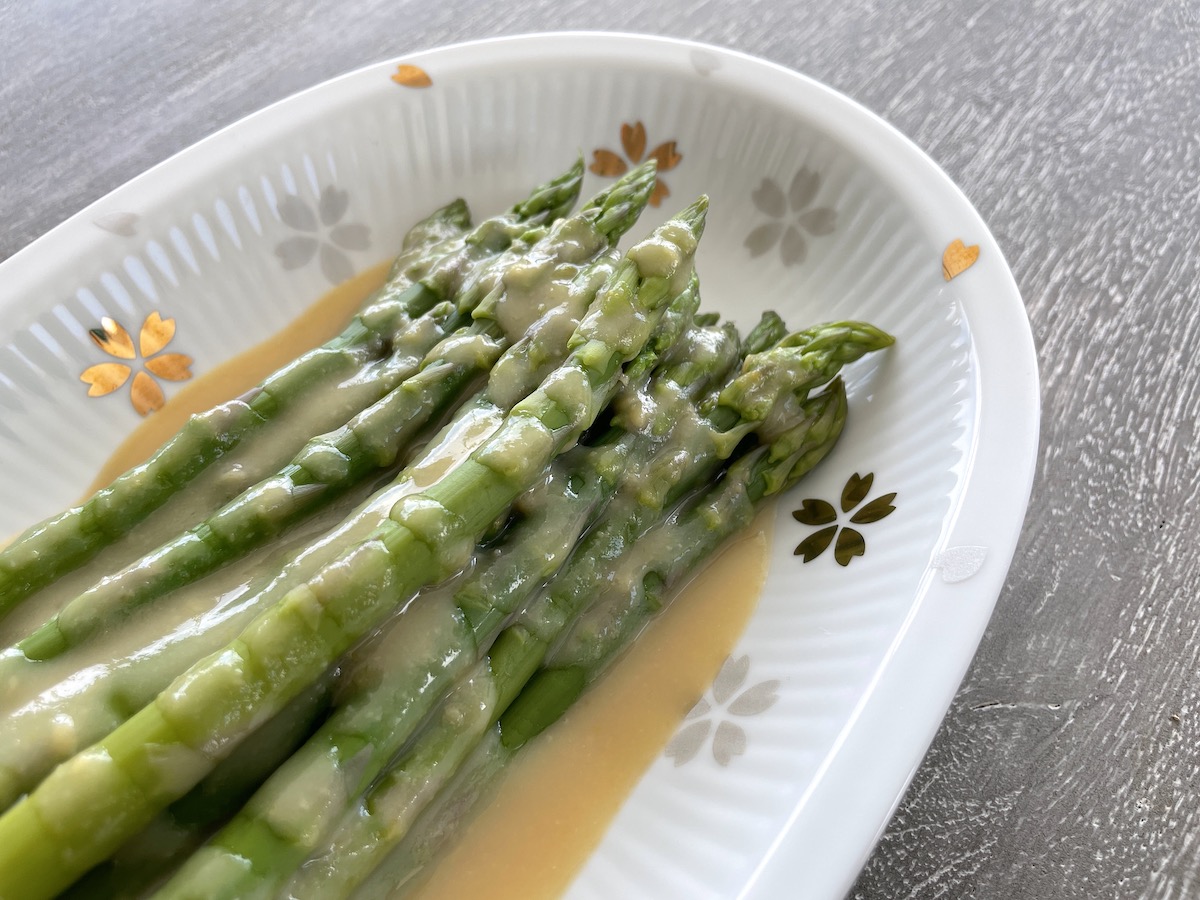
Miso Drizzled Asparagus

This wonderfully light vegetarian side can be prepared earlier in the day and brought out when dinner is served! Perfect when entertaining guests or in the middle of a busy week!

Ingredients

  • 12-16 oz Fresh asparagus
  • 2 Tbsp White miso, I prefer Cold Mountain Mellow White Miso or use Kanemasa Mild Shiro (white) Miso.
  • 2 Tbsp Unseasoned rice vinegar , I prefer Mizkan Rice Vinegar.
  • 1 Tbsp Sugar
  • Small amount lemon zest (Optional but highly recommended)
  • Salt (Used in water for blanching asparagus)

Tools

  • Large pot, 5 quart pot recommended
  • Mixing bowl and colander that fits inside
  • Cooking chopsticks or tongs
  • Spatula
  • Measuring cup
  • Measuring spoons
  • Spoons for mixing and tasting
  • Microplane grater or zester
  • Plastic wrap
  • Serving dish

Directions

Prepare the miso dressing

Add miso, rice vinegar, and sugar to a small bowl and stir together thoroughly. Add a small amount of lemon zest, not much is needed. Check for balance of flavors and adjust to your taste especially if using different brands than suggested above.

Prepare the asparagus

Rinse the asparagus under cold water and break off the bottom ends where it naturally snaps off. Set aside the spears. You may want to break/cut off a couple of small pieces to have an easy way to check for doneness when blanching. I find it best to eat a small piece to determine texture as sometimes the skin can be very tough.

Fill a large pot (large enough to hold the asparagus spears without breaking) with water. Heavily salt the water and bring to a boil.

Once the water boils, add the asparagus and bring back to a boil. The asparagus should cook quickly if the spears are thin, do not overcook. Pull out one of the small pieces to eat to determine the doneness. Remember it is good to undercook slightly as the spears will continue to cook even after running under cold water. When happy with the texture, drain the asparagus from the boiling water and immediately run under cold water to cool off the spears. Drain completely and set aside.

Drizzle with dressing and serve

Plate the asparagus so the spears are facing in the same direction. Drizzle the dressing over and serve!

Can be made ahead…

Store the asparagus and the dressing separately in the refrigerator if not eating immediately. Pull out the asparagus before serving and allow it to warm up closer to room temperature. And just before serving, drizzle the asparagus with the dressing.

Enjoy!

Don’t forget to submit a photo of your creations!  You can upload your photos using my Contact form!
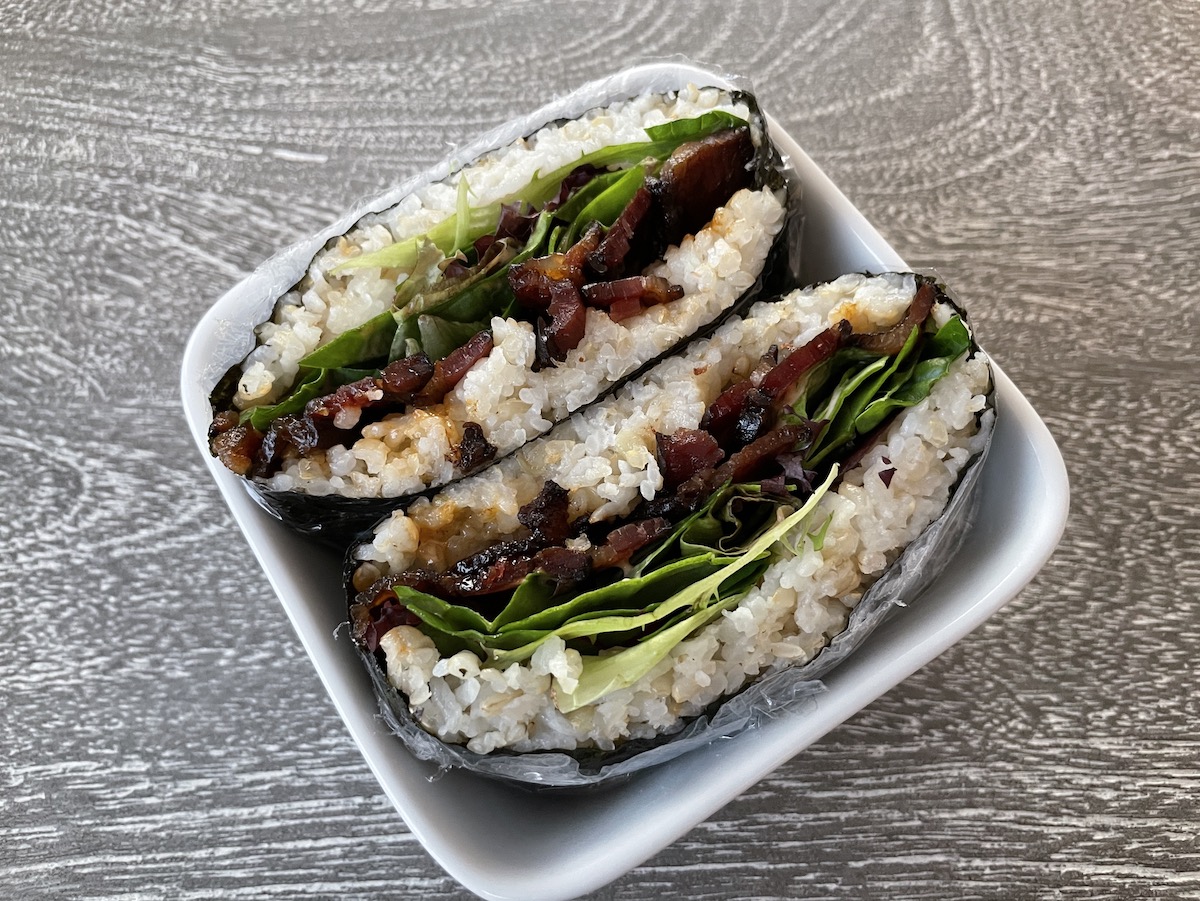
Onigirazu – A Japanese Rice Sandwich

Onigirazu is very simply a rice sandwich, but don’t underestimate this easy to make and fun to eat dish! It is also very tasty! While my favorite is Black Forest bacon with sriracha mayo…you can make this with any number of your own favorite fillings! I show you the basic technique and that’s all you need to get started!  Enjoy!

List of Ingredients 

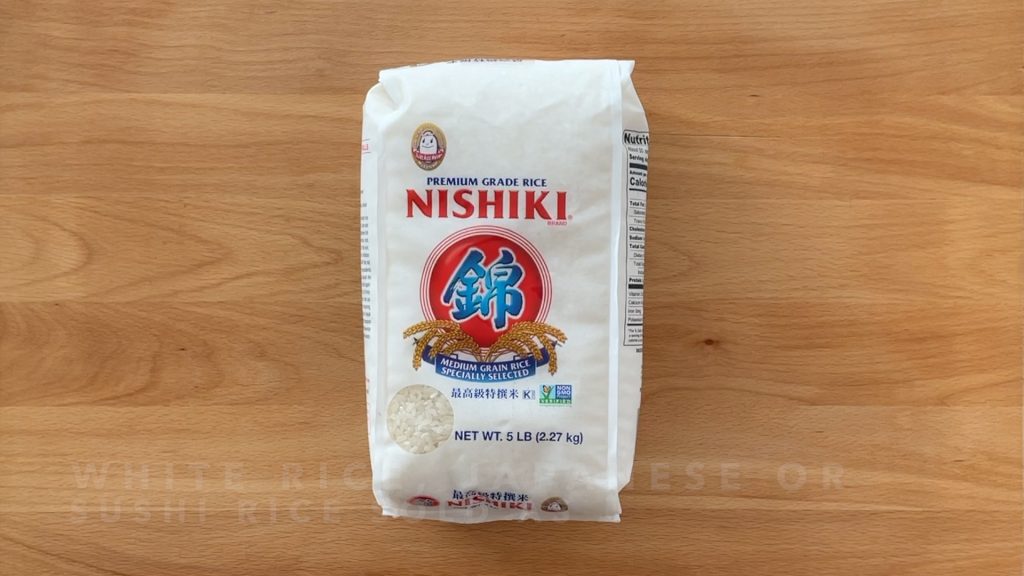
  • White rice, Japanese or sushi rice (typically sold as short-grain but I prefer the Nishiki medium grain rice for cost and flavor
    Nishiki Medium Grain Rice
    Nishiki Medium Grain Rice

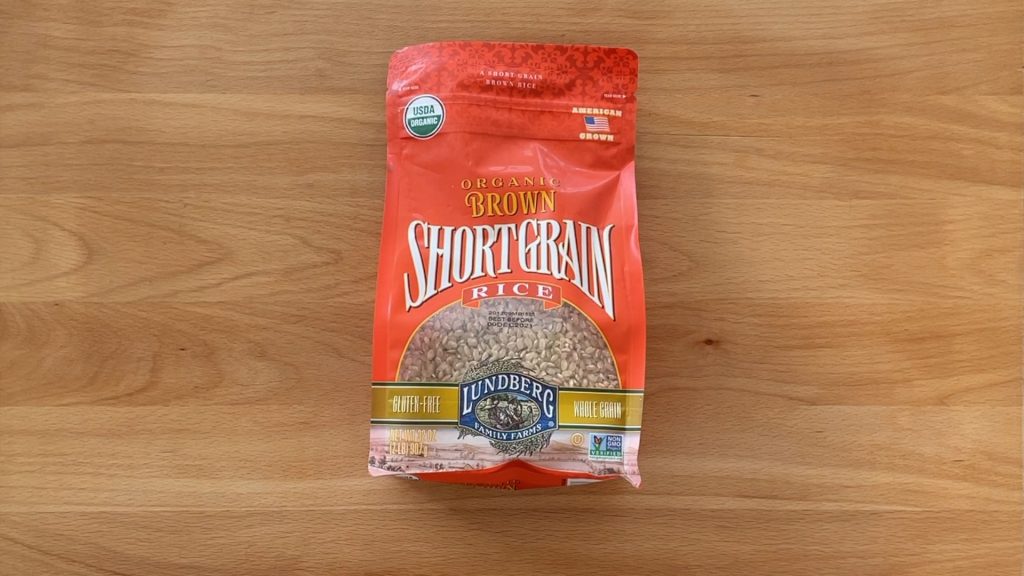
  • Brown rice, short grain
    Brown Rice, Short Grain
    Brown Rice, Short Grain
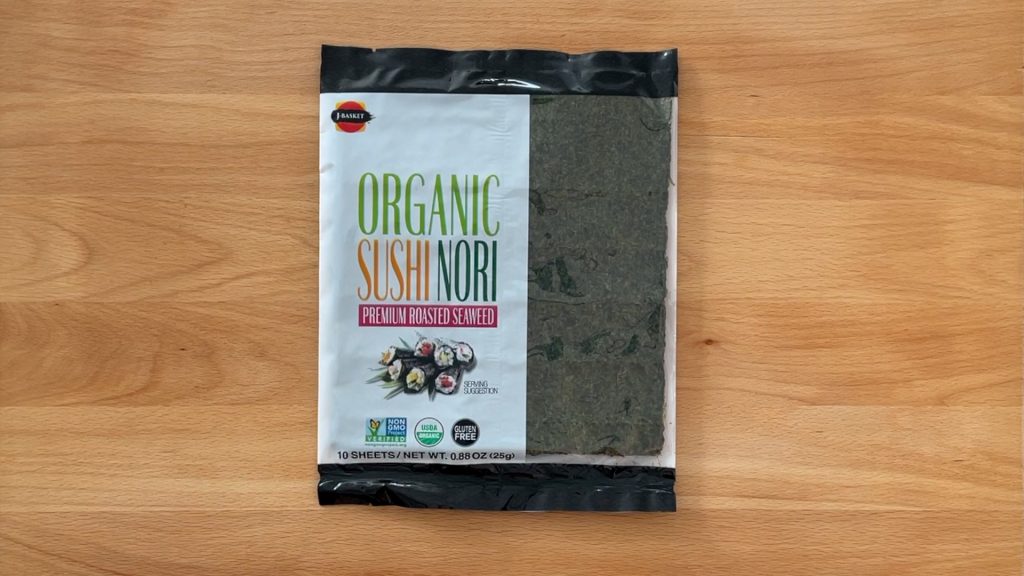
  • Sushi nori, a roasted Japanese seaweed
    Sushi Nori
    Use any sushi nori available
  • Bacon, I like the Wellshire Black Forest Thick Sliced Bacon
  • Spring salad mix or green or red leaf lettuce
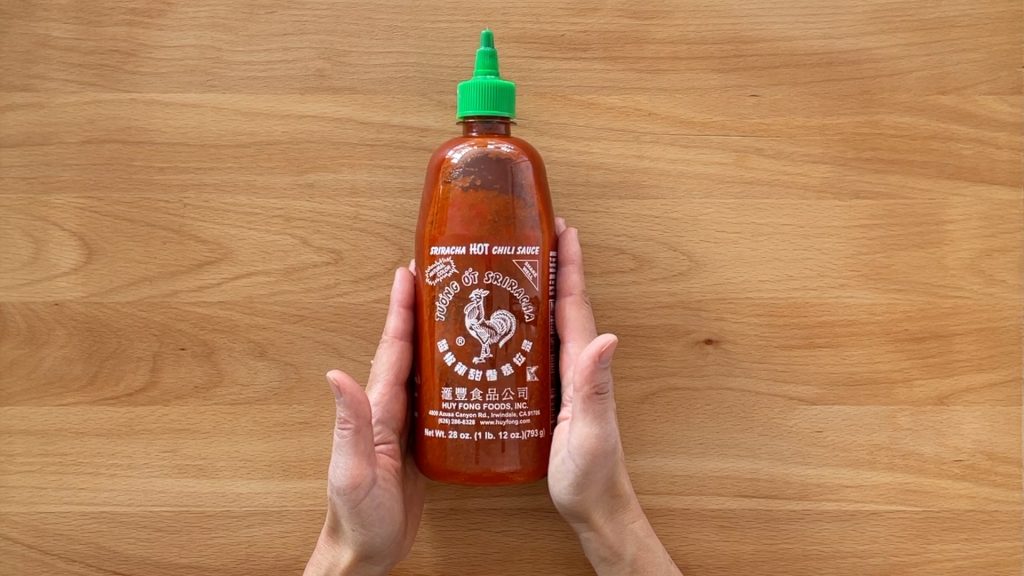
  • Sriracha (Please use the sriracha made by Huy Fong Foods. This brand can be found in many local markets.)
    Huy Fong Foods brand Sriracha
    Huy Fong Foods brand Sriracha
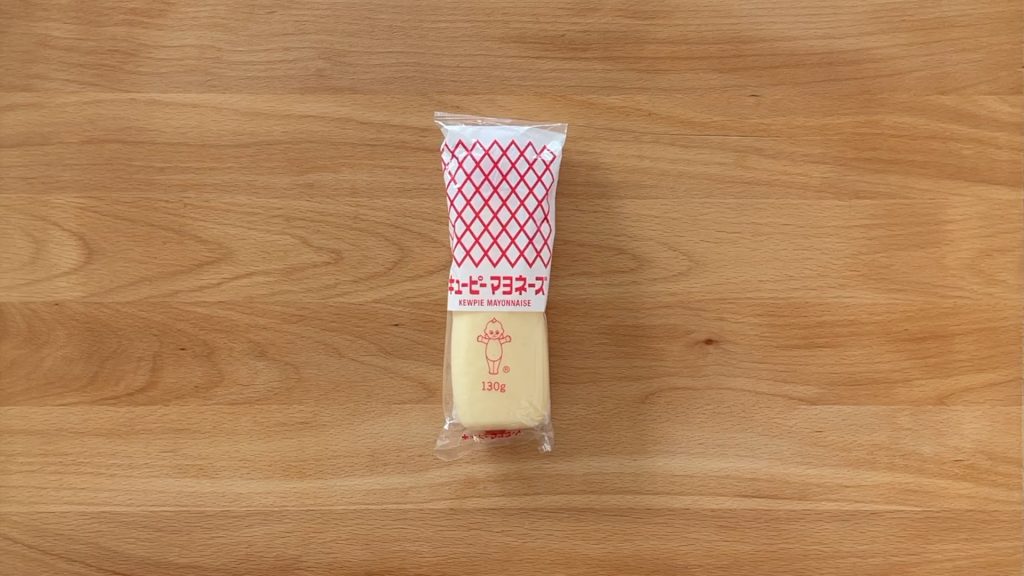
  • Mayonnaise, I like using Japanese Kewpie Mayonnaise found in Asian markets
    Kewpie Mayonnaise
    Kewpie Mayonnaise

List of Tools

  • Fry pan or baking sheet and oven mitts to cook the bacon
  • Paper towel lined plate and cooking chopsticks or tongs
  • Cutting board and knife
  • Plastic wrap
  • Small bowl and spoon to make the sriracha mayo
  • Rice cooker and rice cooker measuring cup
  • Rice paddle and resting plate
  • Rice rinser or small mixing bowl. Avoid using the rice cooker pot to rinse the rice doing so will ruin the surface of the pot much faster.
  • Ziploc, gallon size to store any unused sushi nori. Place the unused portion of sushi nori in the Ziploc bag and be sure to press out all the air. Then place the bag in a cool, dry place. For longer storage, place in the freezer however the nori will not be as crisp.
  • Serving bowl

Directions

Prepare the rice

Using the measuring cup for the rice cooker, measure 1 cup brown rice and 1 cup white rice. Rinse rice w/ cool water until the water runs clear. Place the rice in the cooking pot and fill with water. (Be sure to move the pot back and forth to even out the rice for accurate measuring.) The water level should read between the 2 cup brown rice line and 2 cup white rice line. Let sit for 30 minutes before starting the rice cooker to soften the brown rice. Cook the rice using the white/normal rice setting. When the rice is done, let it sit an extra 10-15 minutes to allow for more steam to be released. And then be sure to fluff using a rice paddle.

Prepare the bacon

Cook the bacon using a large fry pan for the stove top on medium heat or a large baking sheet for the oven at 385 to 400 degrees F. If using a baking sheet be sure to line the baking sheet with one layer of bacon without overlapping. (I like to use 385 degrees F as that cooks the bacon nicely without burning.) In both cases, be sure to flip the bacon to cook both sides evenly and then cook to preferred doneness. Place the cooked bacon on a paper towel lined plate to absorb the grease.

Prepare the Sriracha Mayo

In a small bowl, mix together about 1-2 tablespoons of mayonnaise with sriracha to taste. And set aside. This should be enough for one onigirazu.

Assemble the Onigirazu

Place a cutting board on the counter, lay a piece of plastic wrap larger than a sheet of sushi nori on the cutting board. 

Lay down plastic
Lay down plastic

 Place a full sheet of nori on the plastic wrap on the diagonal like a diamond. (Be sure to place the shiny, smooth side down.) 

Place Nori
Place Nori

Place rice in the center as a square approx. 3 ½” x 3 ½” and ⅜-½” deep. 

Place rice
Place rice

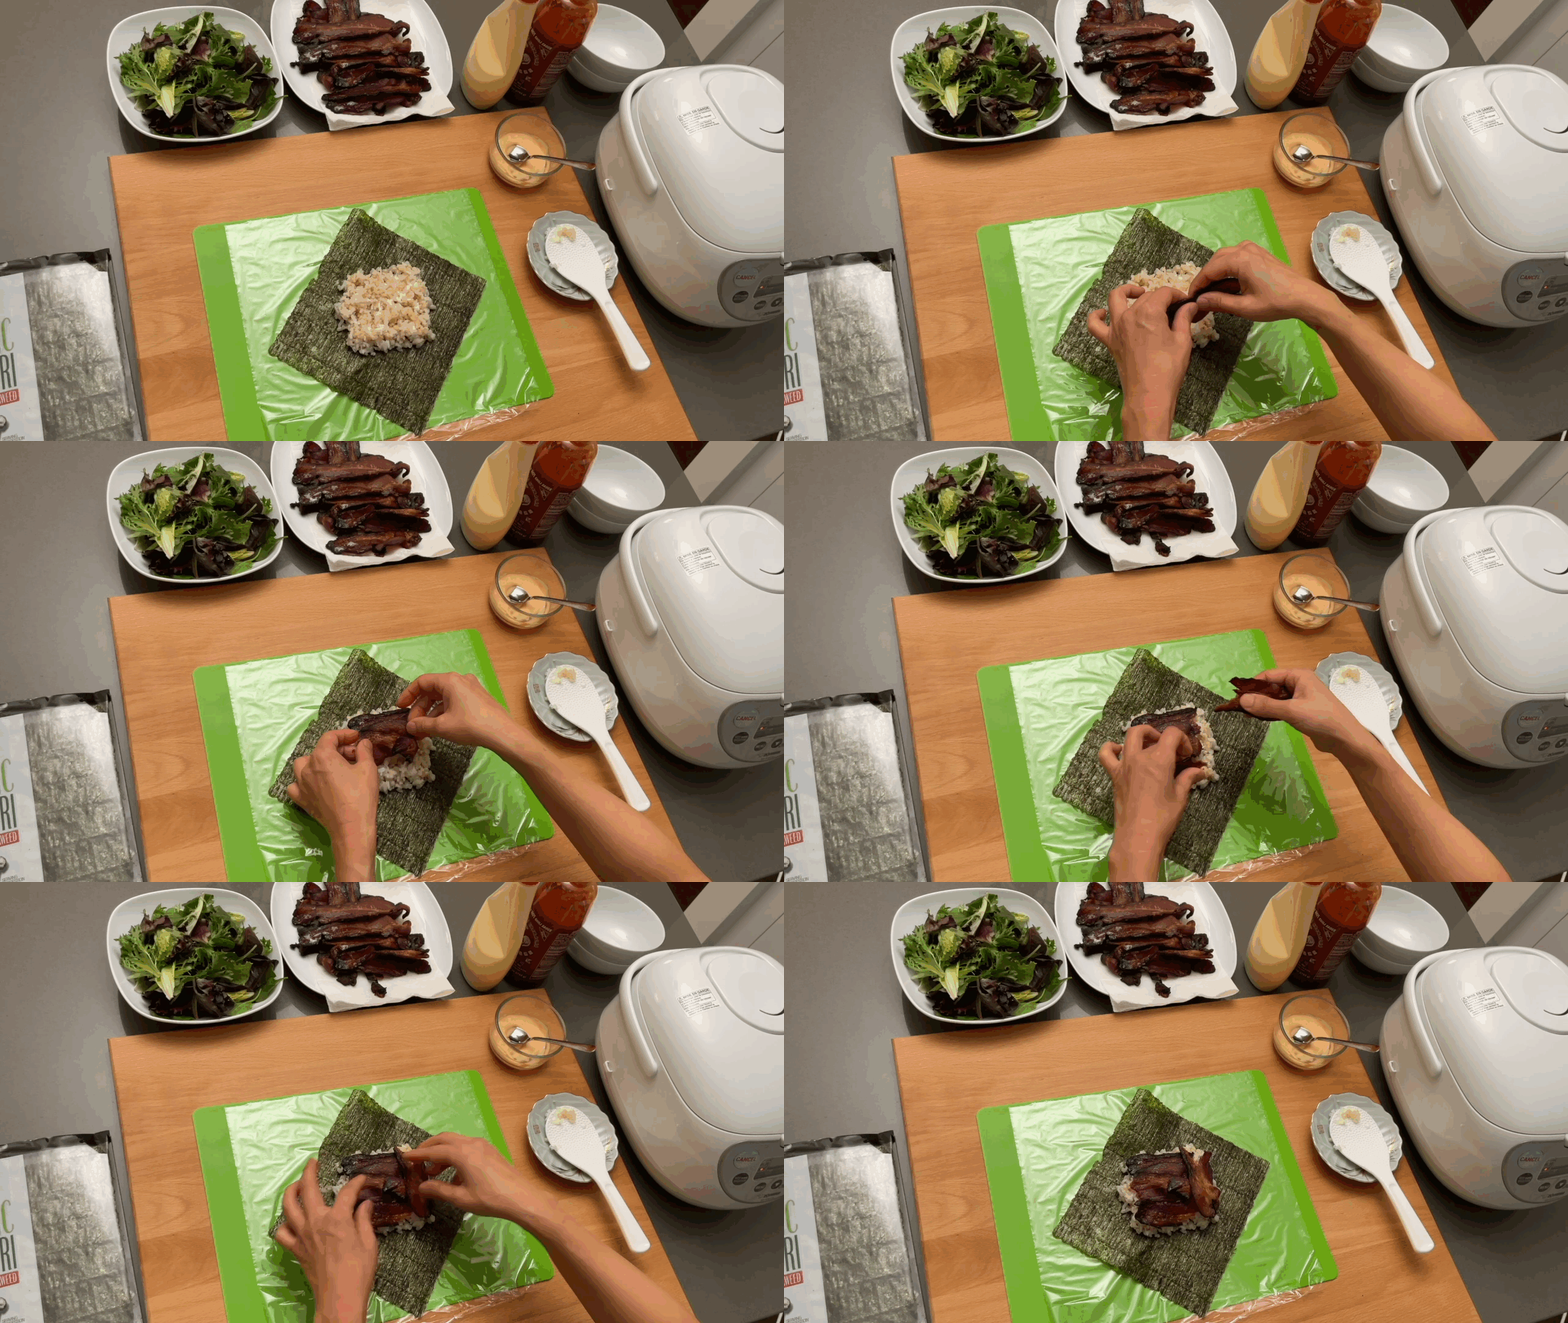
Now break the bacon in half and place on top of the rice. 

Place bacon
Place bacon

Then stack the lettuce on the bacon and now drizzle the Sriracha mayo on the lettuce.

Place lettuce and mayo.

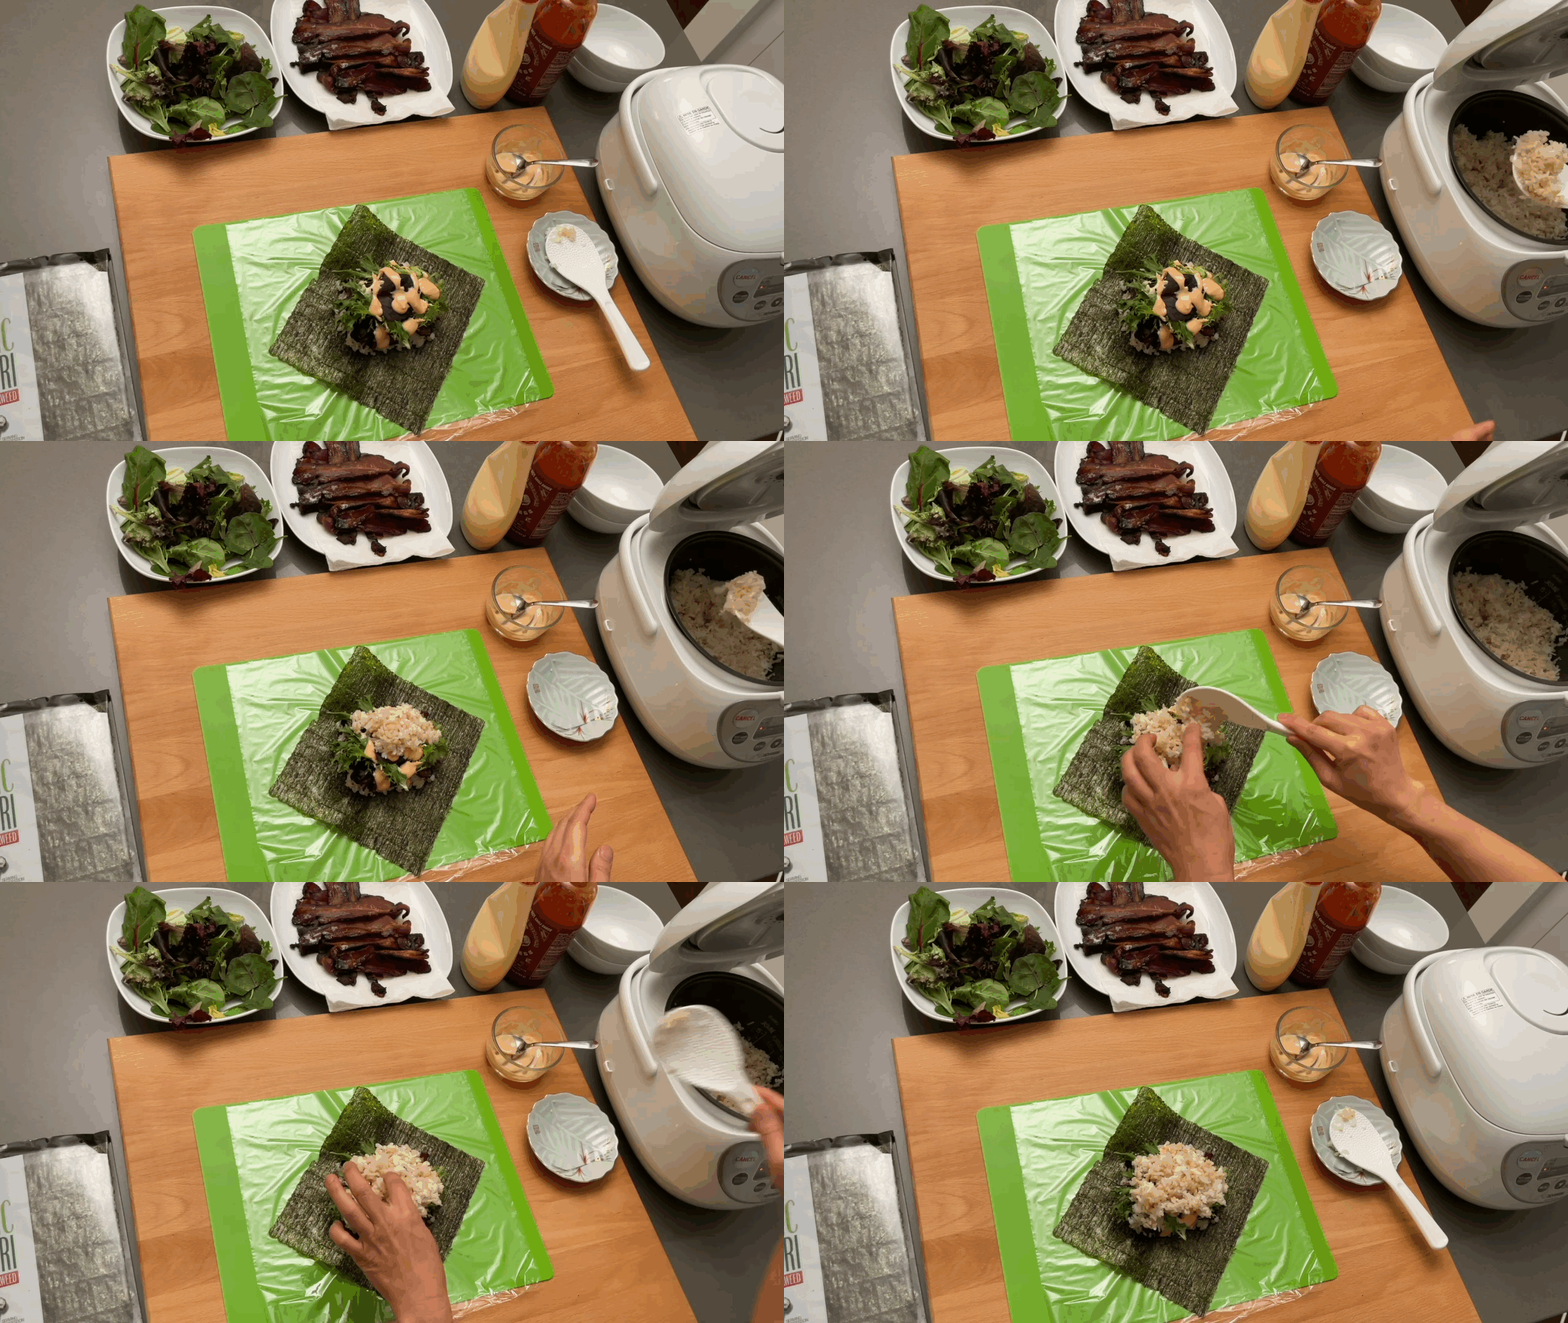
Scoop rice to cover the top similar to the layer on the bottom which can get a bit challenging. It doesn’t have to be perfect. 

Place top rice
Place top rice

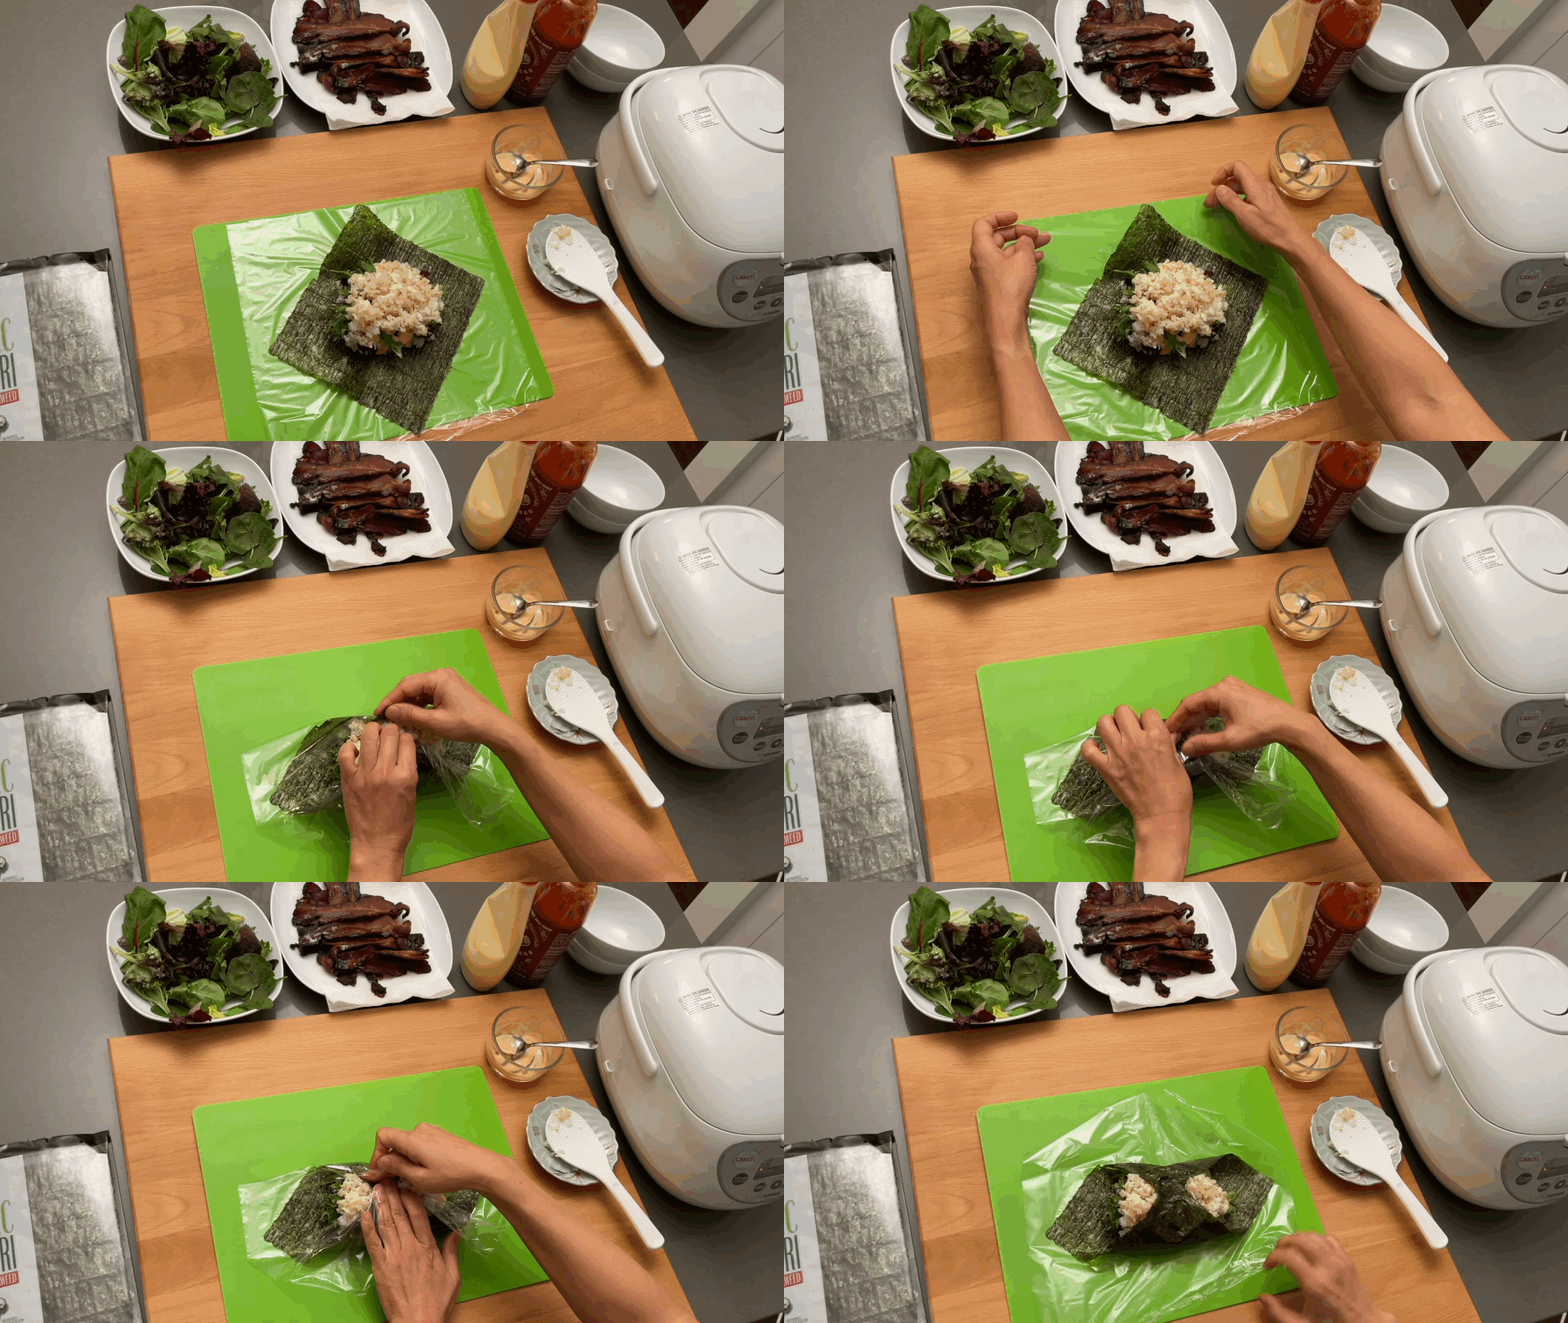
Grab the plastic wrap and nori on the top and the bottom of the diamond and fold towards the center and press gently. Once the top and bottom nori corners are securely folded return the plastic wrap to the cutting board.  

Fold Top-Bottom
Fold Top-Bottom

Now lift the left and right corners of the plastic wrap and nori folding towards the center. Carefully tucking in the ingredients while folding. Nicely secure the plastic wrap from the sides and then fold the plastic wrap from the top and bottom towards the center forming a package. 

Fold Sides
Fold Sides

Cut in half and serve!

Cut
Cut

Storage

Best eaten the same day so make only what you need!

Enjoy!


Don’t forget to submit a photo of your creations!  You can upload your photos using my Contact form!
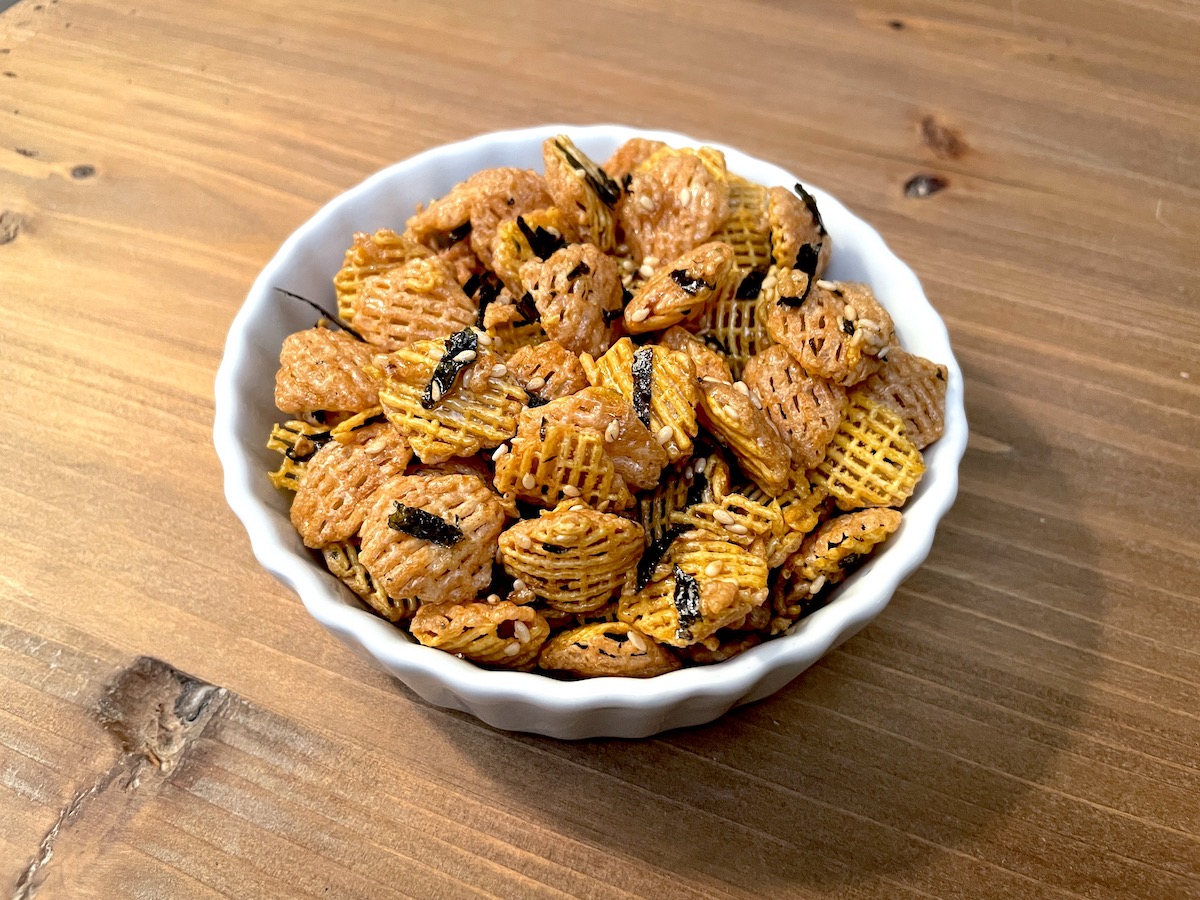
Asian Inspired Snack Mix (sweet)

This Asian Inspired Snack Mix is incredibly easy and out of this world amazing! Dangerously addictive…it is best shared with friends! Trust me, they will love you for it! Enjoy!

List of Ingredients

  • 1 Box Crispix (12 ounces)
  • 3 Tbsp Salted butter
  • 3 Tbsp Sugar
  • 3 Tbsp Light corn syrup (I use brown rice syrup.)
  • 2 Tbsp Neutral flavored oil (I use refined expeller pressed coconut oil which has no flavor unlike virgin coconut oil.)
  • 1 ½ Tsp (or ½ Tbsp) Soy sauce or tamari sauce
  • ~2 Tbsp Toasted sesame seed (Can be purchased toasted/roasted)
  • ~⅓ Cup *Ajitsuke nori strips (or to taste)
  • ~½ Cup Spanish peanuts (optional)

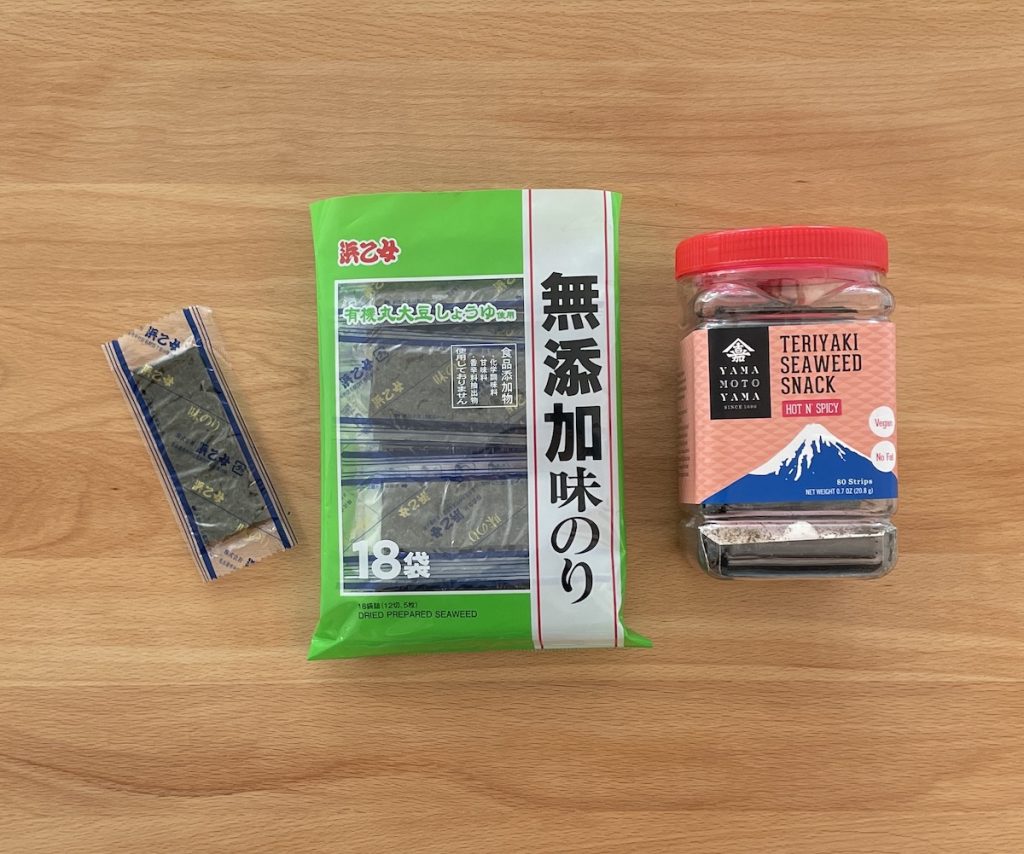
*Japanese seasoned roasted seaweed is sometimes labeled as teriyaki seaweed. You can also use “plain/unseasoned” roasted seaweed but seasoned lends itself to a better tasting snack mix.

Ajitsuke Nori
Ajitsuke Nori- A Japanese seasoned roasted seaweed sometimes labeled as teriyaki seaweed. Sometimes sold in individual packets or in plastic tubs.


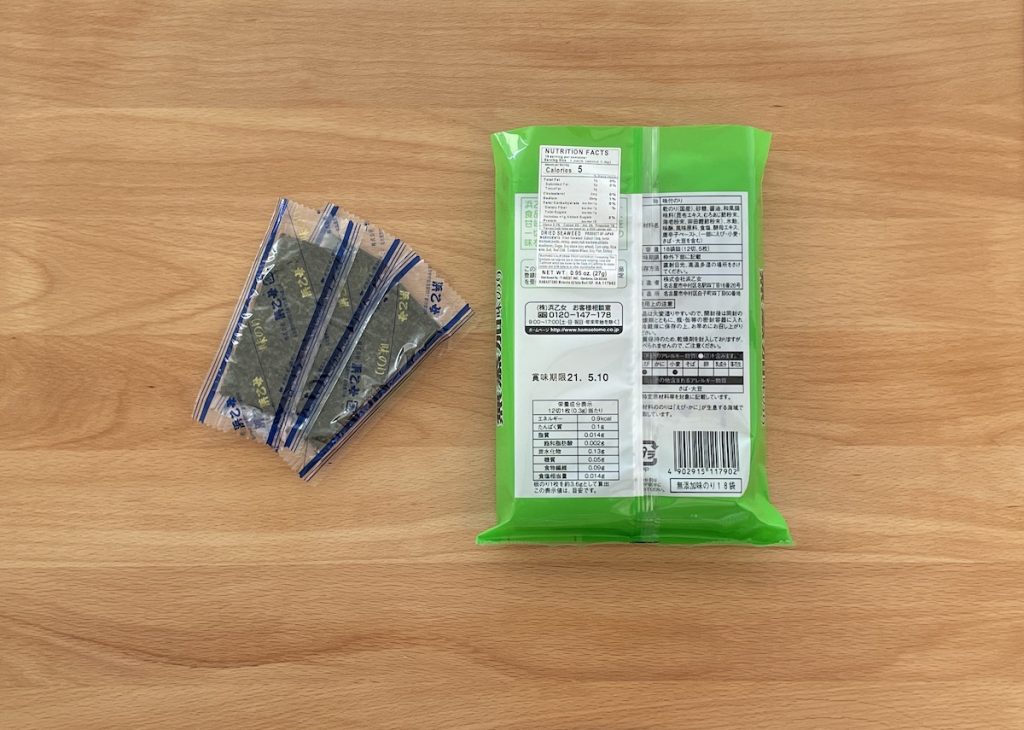
Ajitsuke Nori Label
The above package had no English translation so if necessary read the label. Look for seaweed that is seasoned with soy sauce and a sweetener.


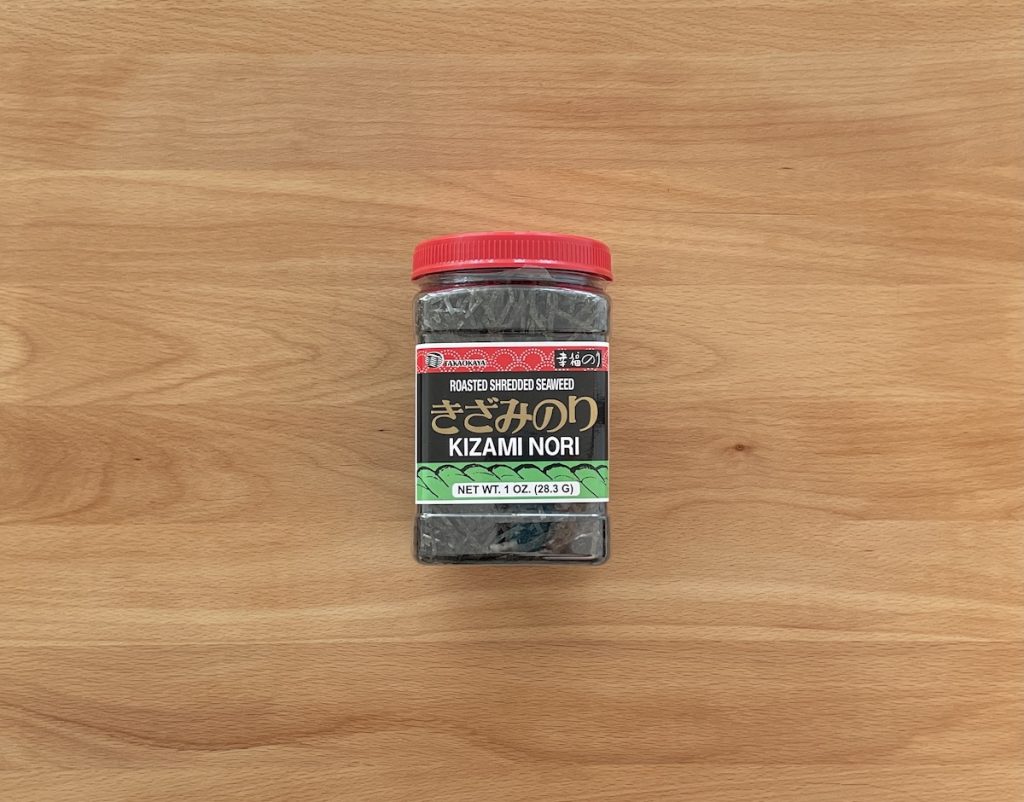
Unseasoned Precut Seaweed
Plain/unseasoned seaweed pre-cut into strips.


List of Tools  

  • Small pot
  • Heat resistant spatula or spoon
  • Cutting board and knife
  • Scissors to cut the ajitsuke nori into strips (Please be sure these are clean.)
  • Measuring spoons and measuring glass is helpful
  • Measuring cups
  • Spoon and spatula
  • Two spatulas and resting plate to toss the cereal with the glaze
  • Extra large mixing bowl (I use a salad bowl.)
  • Parchment paper to line the baking sheet
  • Oven mitts
  • Large baking sheet (I use a 13” x 17” jelly roll pan.)
  • Airtight container or ziploc bag for storing the snack mix
  • Serving bowls

Directions

Prepare the ajitsuke nori and Crispix

The plain/unseasoned roasted seaweed can usually be found pre-cut in the stores. Ajitsuke nori is typically sold in individual packets or in a screw top container in small sheets. Use clean scissors to cut the ajitsuke nori into strips. Aim for strips ⅛” wide by ½”-1” long. Cut enough to loosely fill a ⅓ cup measuring cup. (More or less can be used according to taste.) Sprinkle the strips of nori into the bottom of an extra large mixing bowl and then add the bag of Crispix on top.

Add ingredients to a small pot

Add the butter, sugar, light corn syrup, neutral oil and soy/tamari sauce in a small pot and melt on low heat until the sugar is fully dissolved. Turn the heat down if it begins to bubble. Continue to stir until everything is blended together nicely. Remove from the heat and add in 2 Tbsp toasted sesame seeds and stir until fully incorporated.

Toss the glaze mixture with Crispix

Drizzle the ingredients from the pot over the cereal/nori. Use a spatula to remove all the glaze mixture from the pot. Now toss the ingredients to coat evenly. Add more ajitsuke nori at this point if desired or the ~½ cup of Spanish peanuts. And toss again.

Spread on a baking sheet

Prepare a large baking sheet with parchment paper. (I use a 13” x 17” jelly roll pan.) Spread out the mixture evenly and bake at 250 degrees for 1 hour on the middle rack. Every 15 minutes turn over/stir the mixture to evenly bake.

Let cool completely

When finished baking, let the snack mix cool completely on the baking sheet to maximize crispiness.

Storage

Store in an airtight container or Ziploc bag. Keeps well for a few days!

Enjoy!


Don’t forget to submit a photo of your creations!  You can upload your photos using my Contact form!